Cards

Retirement Card Take 2

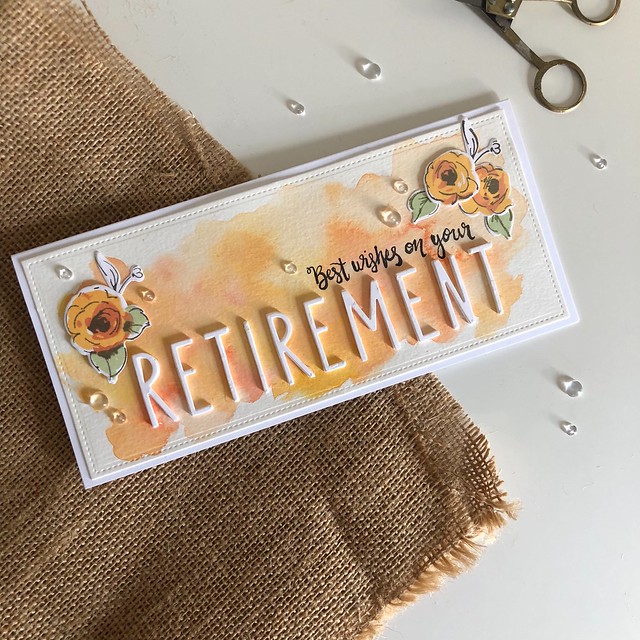
I was recently commissioned to make a retirement card that looked just like this one I made a few years ago. This time, we went for a more Autumnal color scheme, but kept just about everything else the same.

Retirement card

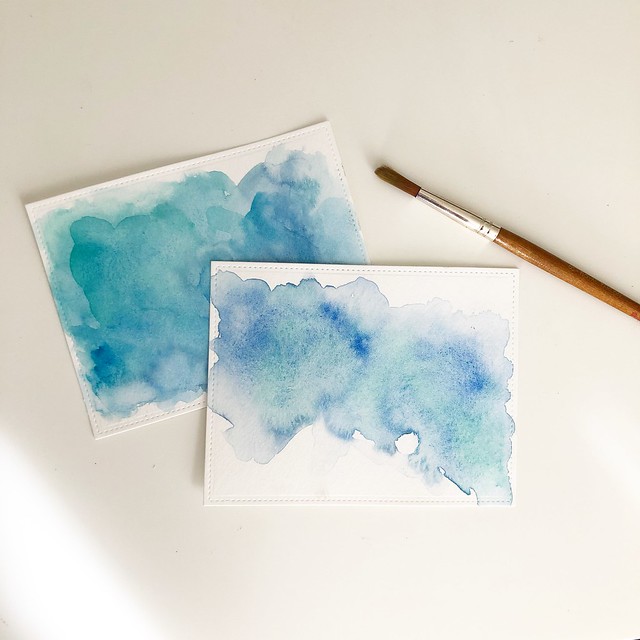
I started with a watercolor background in a combination of orange, yellow and red tones. I then stamped out some Painted Flowers in ink colors that were about the same tone. This was a lot of trial and error and I tried a lot of ink colors until I got a combo that I liked. Phew!

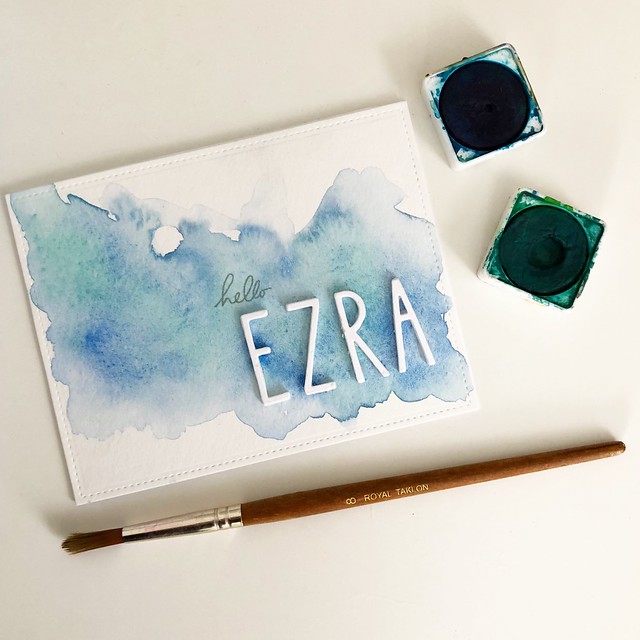
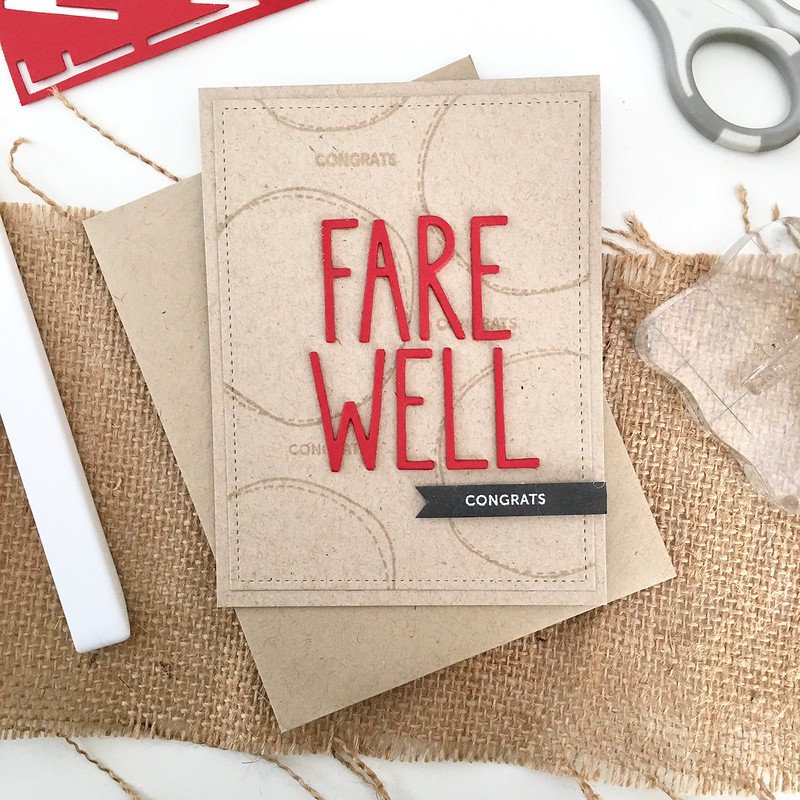
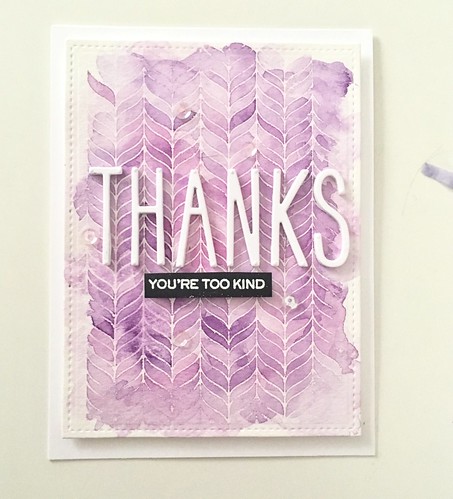
The sentiment is a combination of some hand-lettering I did and the spelling out of the word Retirement (which meant this card had to be an oblong size, about 4.5″ x 8″) using Neat & Tangled Journaling Alpha dies (a favorite die set of mine!).

Retirement card

I like how it turned out! And it shows me that re-visiting a card style again is a really good exercise in creativity. Even though the design elements are essentially the same, I was able to tweak a few parts and practice my lettering, which is never a bad thing. I might even like this second attempt better than the first!

Cards

A New Card for a New Baby

Hi all! Just stopping in today to share a recent card. After what has been a loooong while, I  got back into my craft room twice in the last month! That’s a total win for me.

Baby Ezra card

Most recently I made a card for a friend who has a brand new baby at home, named Ezra. It’s just a simple watercolor background with Neat & Tangled Journaling Alphas on the front to spell Ezra’s name. The hello sentiment is cut from a stamp in another set I had lying around.

Baby Ezra card

Clean and simple. Short and sweet.

Baby Ezra card

I hope your week is off to a good start!

kimberly

Cards

Farewell! Congrats!

Farewell card

I said goodbye to a coworker last week, so a farewell card was in order. There’s something I like a lot about big red letters on a craft background (especially for masculine cards) so I went with that here.

First, for the panel, I used VersaMark ink to stamp out a few wonky circles from the Sparkle and Shine stamp set. I also stamped a few “congrats” from a Mini Messages stamp set (I cut this sentiment apart to only use one of the three congrats messages). I then cut the panel down a bit using a stitched rectangle die.

Farewell card

I cut FAREWELL out of red card stock several times using Jounaling Alpha dies and stacked them up several letters high to give the sentiment some dimension. The congrats was stamped with VersaMark onto black cardstock and heat embossed with some white embossing powder. I then adhered that little sentiment strip to the card with some foam tape.

Farewell card

To finish the card, I adhered the panel onto an A2-sized card base cut from some more craft cardstock. No extra frills because it is a masculine card, but I’m pretty pleased with how it turned out otherwise!

kimberly

Cards

Short & Sweet // Thank You Card

Thank you card

Hi! Sharing a quick card I made several weeks ago, using emboss resist, this background stamp, watercolors, Journaling Alpha dies and a sub sentiment from this Wplus9 set. Simple cards with pretty watercolor washes make my heart happy!

Thank you card


kimberly

Cards

You Are…

Hello Friends! The summer seems to be winding down here, which means the summer staffers who’ve worked for me this summer are headed back to school in a few weeks. It’s always tough to say goodbye to them, but so great to have been a part of their summer job experience. Lately, every year, I’ve made cards for the two summer staffers, and we have a nice BBQ celebration to mark the end of a busy summer and to celebrate their efforts. This year is no different, and I’m really looking forward to some burgers and hot dogs on the grill!

Appreciation cards

These two are pretty match-y, but are obviously different colors with different sentiments. I heat embossed the Mini Scenery: Madison stamp in white onto each panel, and created watercolor washes over top, as ya’ll know I love to do.

Appreciation cards

The YOU part of the sentiment was cut using Journaling Alphas dies, and the sub sentiments, embossed in white on black cardstock strips, came from the Hand Lettered Thanks stamp set.

Appreciation cards

A few sequins on each to finish them off (and some confetti tossed around) and they were finished!

kimberly

Cards

Negative Die Cut Thank You Cards

I’ve been focusing a lot of energy on my Etsy shop lately, and things seem to be going well there which means I’ve been making a lot of quick thank you cards that I slip into orders. I made these two recently, and I thought I’d share them here.

CAS thank you card

Both cards came together pretty quickly. And the best part was that I was able to use up some “scraps” to put them together. I started by die-cutting the word thanks into a panel (one rectangular and one round) using Journaling Alphas dies. I then put a scrap piece of already-painted watercolor paper (I have a lot of practice panels lying around) behind the cut outs, propping the die cut panel up with some foam tape before adhering the two pieces together.

CAS thank you cardI then found a scrap of black cardstock (lots of that lying around, too) and stamped out sub-sentiment from the Hand Lettered Thanks stamp set, heat embossed in white.Then I added everything to a card base.

The process was much the same for the circular card.

Circle thank you card

You can see that with the second card I didn’t bother with adhering that little center portion of the “A” because I learned after the first card that ain’t nobody got time for that… :)

Oh! I also added a bit of Wink of Stella glitter to the watercolor panel pieces before adding them behind the die-cut panels. The glitter doesn’t show up well in the photos, but it added a little bit of shimmer to the card, which was nice.

Circle thank you card

That’s it!

kimberly

Cards

Father’s Day Card


Father's Day card

It’s almost Father’s Day, which means the weekend is approaching! This Father’s day card includes some watercolor and my favorite Journaling Alpha dies, which are great for creating sentiments when you have zero fathers day-specific stamps or dies…

Father's Day card

I did several watercolor washes on a Canson watercolor paper panel in various shades of blue and green. I also added some blue spatters with the watercolor and white spatters with some white acrylic paint. While that dried, I cut out the letters to spell father from some white cardstock and fun foam, and layered the cardstock on top of the foam with some multi matte adhesive, and set those aside. When the panel was dry, I figured out where I wanted the words happy and day to go. This part of the sentiment comes from the Bold Blooms stamp set, I just cut the stamp apart to separate the words. Yep. Cut it apart. Photo polymer stamps are easy to cut apart and they will fit back together nicely once mounted onto an acrylic block if you want to stamp the whole thing again, so it’s really no big deal if you want to do some stamp surgery!

Father's Day card

Anyway, I stamped happy and day on my panel in black ink, and then mounted my die cut letters. I felt the panel still needed something, so I distressed the edges a bit with a distresser tool and then mounted it onto  piece of vellum that I tore the edges from to make the whole thing look even more distressed. Unfortunately, the photos don’t pick up that detail. I mounted everything onto an A2-sized card base and called it finished!

Father's Day card

Do any of you have special plans for Father’s Day?

kimberly


This post contains some affiliate links.